Black and White:

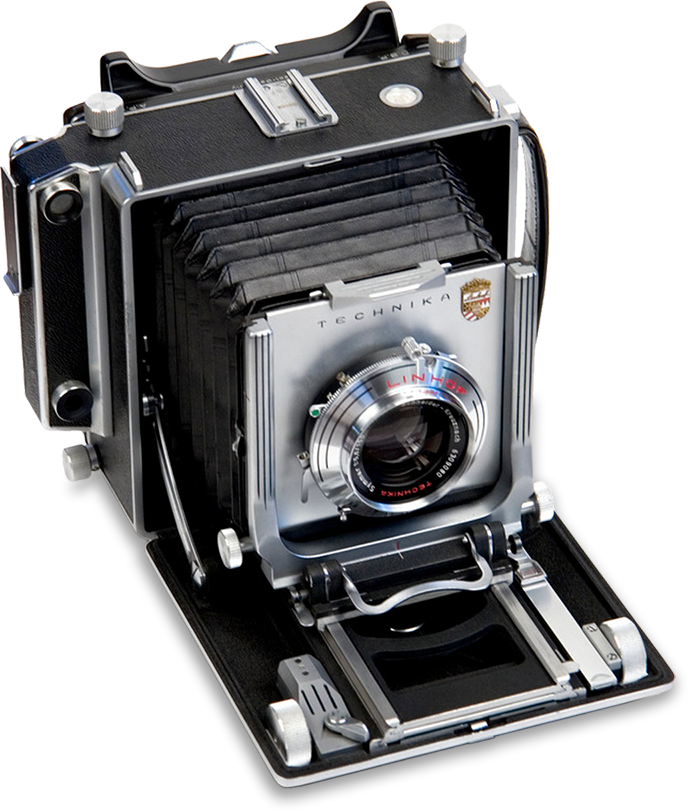
Linhof Technika III V5
Large-format photography in the 1980s and earlier, with heavy cameras and individual sheets of film, was clumsy and slow. It was also purposeful and precise, just the thing for the creative photographer wanting to study the scene before him and craft an image expressing his feelings at the moment. This type of shooting was not grab-'n-go snapshot photography. No, each image demanded pre-visualization of the final photographic print and the technical and aesthetic decisions that had to be made from initial camera exposure to darkroom processing to the end form of presentation.
I learned large-format photography in 1972 when I served in the Army. Technical mastery behind the lens and in the darkroom was expected, not creative expression (which later art school would remedy). Before the end of my Army service, I privately bought a used Linhof technical camera, like the one pictured, for personal use. The camera had all the adjustments that anyone would ever need. I added a complement of lenses, lots of sheet film holders, and a sturdy tripod. The kit could all be carried to trail and field, where I would find visual inspiration in nature.

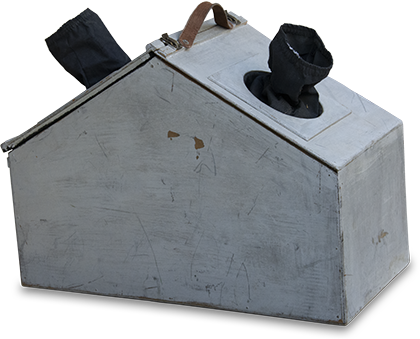
portable film changing box
Individual double-sided film holders had to be loaded in total darkness, which was a problem when I was away from my home darkroom. I could take only as many shots as the number of film holders I had. To solve this limitation, I built a portable film changing box to unload exposed film sheets and reload with unexposed sheets. It worked well and enabled me to take weeks-long shooting trips. When I returned home and to my basement darkroom, that’s when I processed the boxes of exposed sheet film.
Zone System
I adopted the Zone System for determining the optimal exposure based on precise measurements of light in the scene. For scenes of high contrasts—rich lighting, bright highlights, and deep shadows—, I would decide at the moment of exposure that the film sheet would need shorter development times (or different development chemistry), less than normal, in steps denoted as N-1, N-2, or even N-3. Then, for low-contrast scenes, I might determine that the film would need N+1 or N+2 treatment. I had separate film holders and boxes for exposed film marked N-2, N-1, N, N+1, and so on to keep exposures separated and ready for customized development back in the darkroom. Once processed, I marked each sheet with an identifier: a letter/sequential number combination, the N category, and any special processing treatment. I wanted every exposure, every print made from that sheet of film, to offer the best representation of my thinking and feeling at the moment the camera shutter clicked open.
Filters
By using color filters attached to the camera lens, I could alter how light reflecting from colored objects was translated to shades of gray in the black-and-white print. For example, in the black-and-white rendition, green foliage would appear lighter than other colors if I used a green filter over the lens. Or, using a red filter would result in darkened grays in a photograph capturing cyan-blue sky. In the 70s, as is today, black-and-white film stock was relatively equally balanced in sensitivity to all colors—panchromatic, or simply “Pan,” as film was labeled. The use of color filters shifts the monochrome representation in panchromatic film one way or another, enabling a greater degree of creative expression. When photographing sweeping landscapes in western states and Canada, for example, I often used a blue filter to actually lighten blue sky in the black-and-white photograph. Why? The wet-collodion photographic process used by nineteenth-century Western landscape photographers was mostly sensitive to the blue portion of the light spectrum, much less so reds and greens, and that’s why skies in their photographs are so light in tone. It was an uncontrollable factor to them, but I appreciated the resulting effect and chose to create photographs in resemblance (and homage) for some scenes.
My camera work was methodical and intentional. Everything was there in the processed negative. The performance came later in the print.
Color:


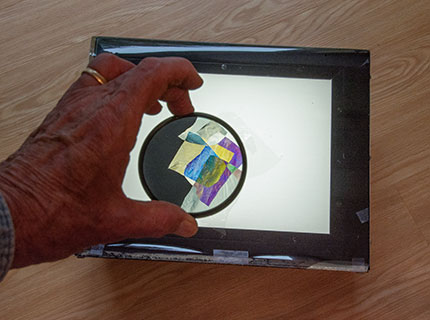
Cellophane as viewed through a polarizing filter attached to the camera lens.
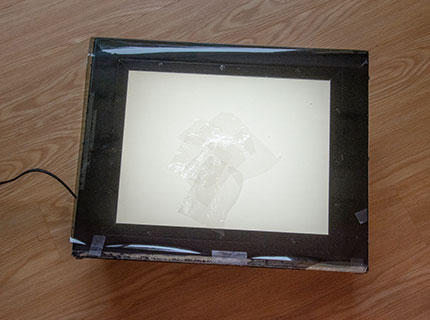
I do not recall the first time I noticed the strange phenomenon of clear cellophane showing rainbow colors. Perhaps it happened while looking at a candy wrapper while wearing Polaroid sunglasses. I knew that some color photographers used a polarizing filter to intensify deep blue sky and eliminate glare. I realized that by using this filter on the camera’s lens, I could photograph the colors coming through the otherwise clear cellophane. I could not explain the science of polarized light waves and birefringence; I just appreciated the creative potential of capturing colors where none were first apparent. My experimenting took me indoors—a lightbox, two polarizing filters, and a roll of clear cellophane wrap were all I needed.
By placing a full size sheet of polarizing film over the lightbox and a round polarizing filter on the camera lens—the camera was on a tripod aimed straight down at the lightbox—, I could take photos of cut shapes of clear cellophane placed on the lightbox. The colors and composition could be seen only on the camera’s ground glass, not from the side. That would be the image I would capture on film. By rotating the polarizing filter on the camera lens, all the colors would change. Colors would also change when multiple layers of cellophane were stacked and arranged just so. Layer after layer of cellophane triangles, realigned this way and that, made the composition come into being. A film holder loaded with color negative sheet film was inserted, and click!—the shutter was released. The feeling was like seeing a landscape that only I could create, where form and juxtaposition—and, for the first time, raw color—became essential elements. Over several months I created several series, each arriving out of the same construction technique, At first the technique and vision appeared a completely different way of creating art. Upon reflection, though, these images were not altogether different from my black-and-white photography where light and form and spirit are the essence.